Case Card Features
The case card is the primary interface for viewing and managing container inspection cases in the Gallery. Each case card displays all relevant information and provides quick access to common actions.
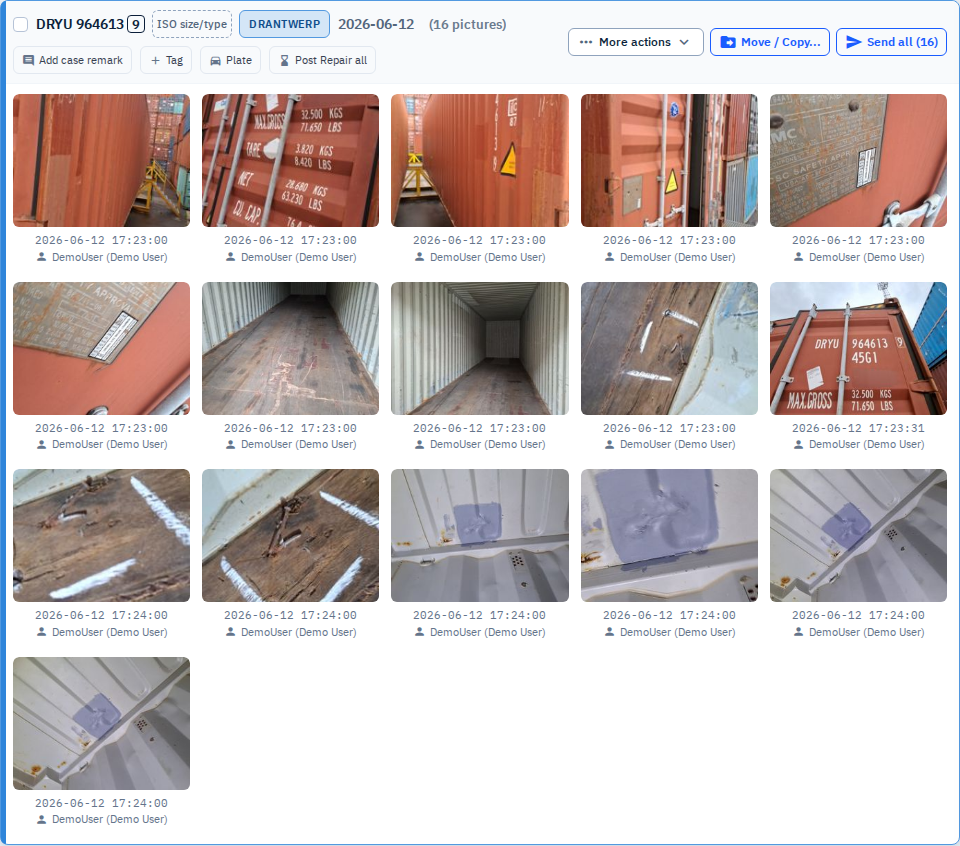
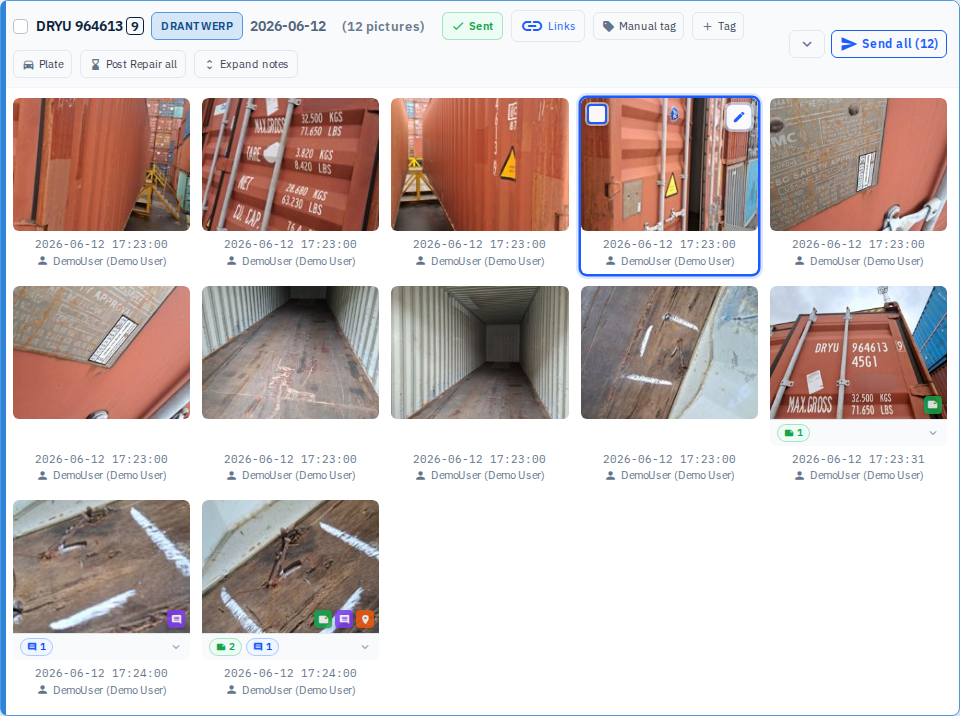
The case card header contains essential information and quick actions.
Mobile App Cases: Separate Cases vs Grouped by Date
The mobile app lets a user start a new inspection case at any time, even for a container already inspected earlier the same day at the same terminal. Each mobile app case gets its own mobile_case_id, so the Gallery can tell them apart instead of silently combining every same-day upload into one case.
Separate Cases (default)
In the default Separate cases view, each mobile app case renders as its own case card. A card created from the mobile app shows a small phone badge in the header, next to the terminal and date:
- with no count — this is the only mobile app case for this terminal/container/day
- with a
+N— there areNother mobile app cases for the same terminal/container/day; hover the badge to see "Distinct mobile app case (N more this day)"
Sibling cases do not share pictures, tags, or actions — sending, hiding, or deleting pictures in one case's card never touches another sibling case's pictures.
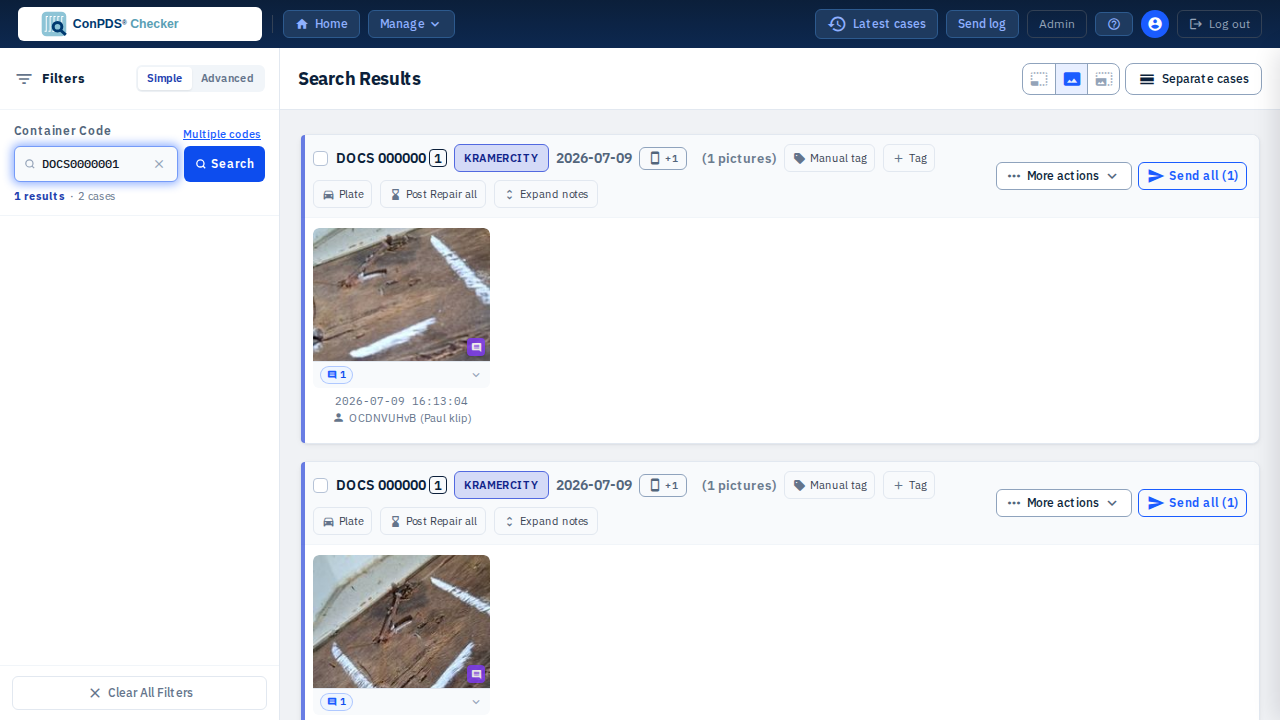
Two sibling cases for the same terminal/container/day, each showing the phone badge with a "+1" — a solo mobile app case (no siblings that day) shows the phone icon with no count instead.
Grouped by Date
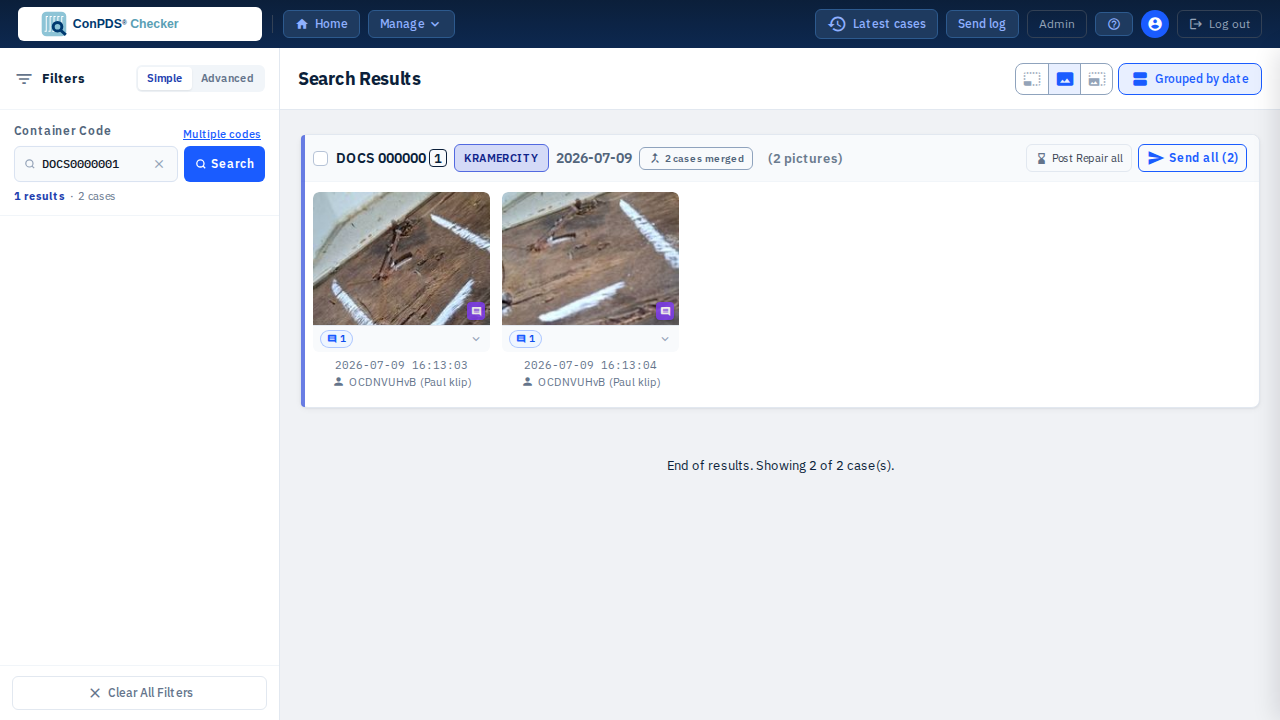
Switch the Gallery header toggle to Grouped by date to instead combine every sibling mobile app case for the same terminal/container/day into a single virtual card, with all their pictures shown together in one grid. This is a display-only view — it does not move or merge any data.
A grouped card shows a "N cases merged" badge (hover for "This card combines N distinct mobile app cases from the same day. Switch to 'Separate cases' to act on them individually."). Header-level bulk actions on a grouped card (select all, After all, Send all (N)) apply to every picture across all merged cases at once; per-picture actions from the thumbnail grid still only affect the picture's own case under the hood.
How to switch view mode:
- In the Gallery header, click the view-mode button (calendar/agenda icon, next to the filter panel)
- Separate cases shows each mobile app case individually; Grouped by date combines same-day cases into one card
- The choice is per-browser-session only — it resets to Separate cases next time you sign in
Merging Cases Permanently
Unlike the display-only Grouped by date view, Merge with... (in a case's Case Menu) permanently moves one case's pictures into another existing case — see Merge with... (Merge Case) below.
Case Card Layout
Header Bar
The case card header contains essential information and quick actions:
Terminal Badge
- Location: Top-left of the header bar
- Purpose: Displays the terminal where the inspection took place
- Color Coding: Each terminal has a unique color (hue) for visual identification
- Format: Uppercase terminal name (e.g., "DRANTWERP", "ROTTERDAM")

Each terminal has a unique color (hue) for visual identification.
Case Information
- Container Code: ISO 6346 format (4 letters + 7 digits)
- ISO size/type (optional): Four-character code (e.g.
22G1) shown next to the container code when set — click to edit if you have metadata permission - Case Date: Date of the inspection (YYYY-MM-DD format)
- Picture Count: Number of pictures in the case (e.g., "(12 pictures)")
Selection Checkbox
- Location: Left side of header bar
- Purpose: Select all pictures in the case for bulk operations
- Behavior:
- Click once to select all pictures in the case
- Click again to deselect all
- Checkmark appears when all pictures are selected
- Works with individual picture selection for partial selections
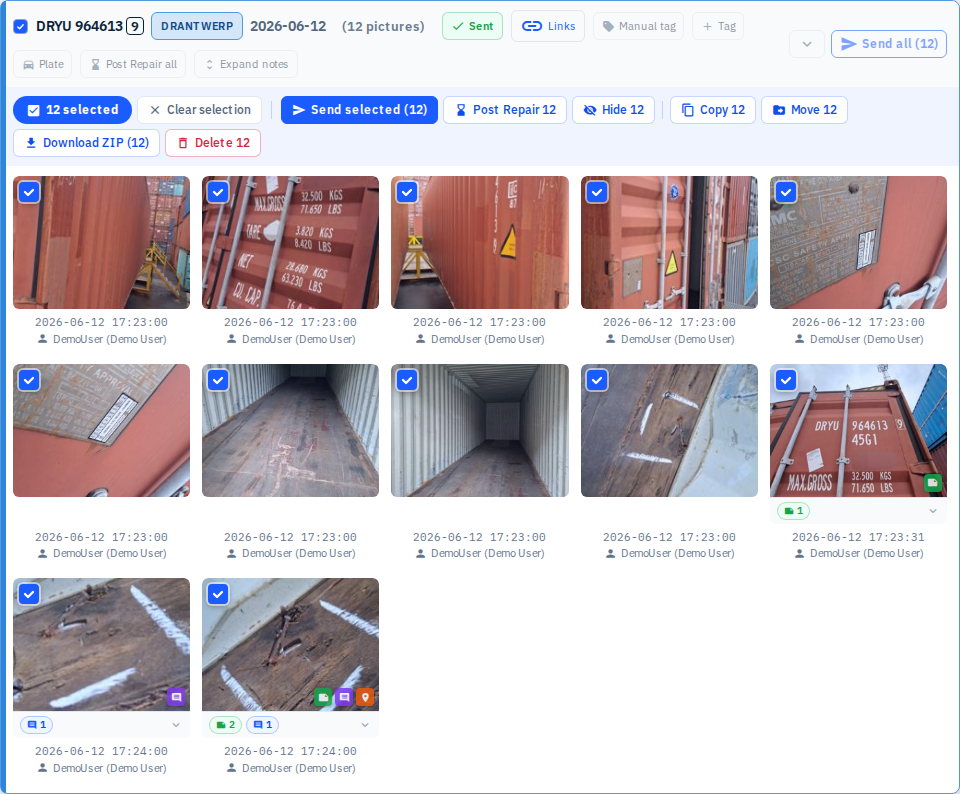
When the selection checkbox is checked, all pictures in the case are selected for bulk operations.
Inline Metadata Editing
The case card supports inline editing of metadata directly on the card, without opening a separate panel.
ISO size/type
Location: Next to the container code in the header
Features:
- View: Confirmed ISO 6346 size/type appears as a short badge (four characters, e.g.
22G1) - Edit: Click the badge (or empty placeholder, when you have edit permission) to type a new value
- Clear: Save an empty value to remove the confirmation
- Scope: Confirmation is per container — it updates every visible case card for that container code, and later uploads inherit it unless overridden
Invalid codes (not exactly four letters/digits) are rejected with an error toast.
Tags
Location: Header bar, after terminal information
Features:
- View Tags: Existing tags appear as chips with remove buttons (if you have edit permissions)
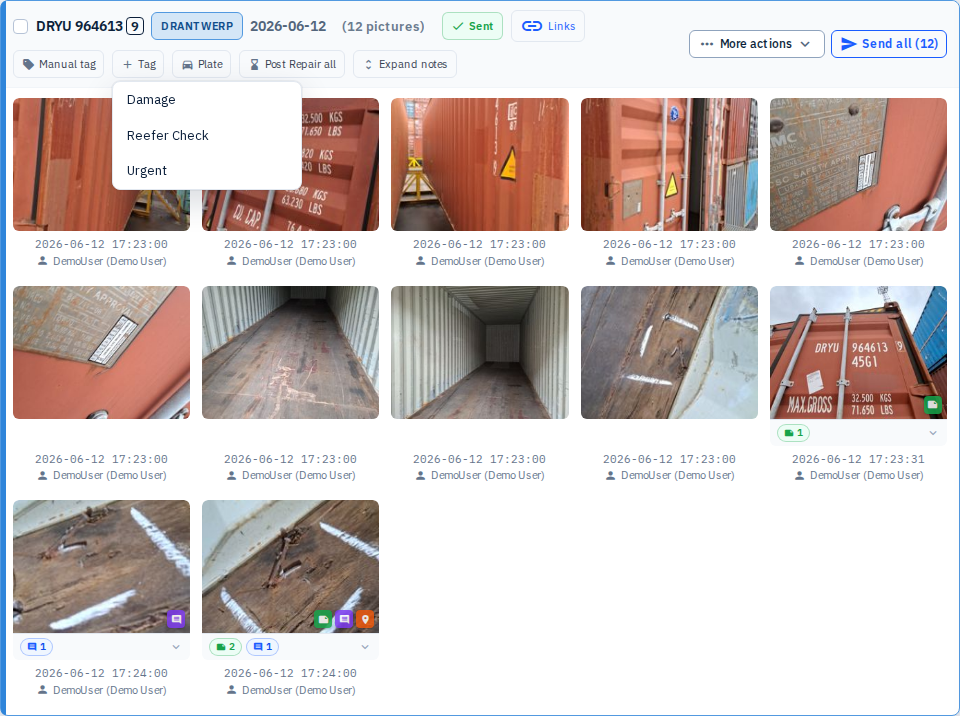
- Add Tag: Click the "+ Tag" button to open a dropdown of available tags
- Remove Tag: Click the × icon on any tag chip to remove it
- Auto-save: Changes save automatically when you add or remove tags
How to Add a Tag:
- Click the "+ Tag" button
- Select a tag from the dropdown list
- The tag is immediately added to the case
How to Remove a Tag:
- Click the × icon on the tag chip
- The tag is immediately removed
The dropdown lists every active tag defined under Tenant Admin → Tags — for example Damage, Urgent, or Reefer Check below. Unlike the mobile app, the web dropdown is not filtered by the case's terminal; it shows all active tenant tags regardless of which terminal(s) they're assigned to.
License Plate
Location: Header bar, after tags
Features:
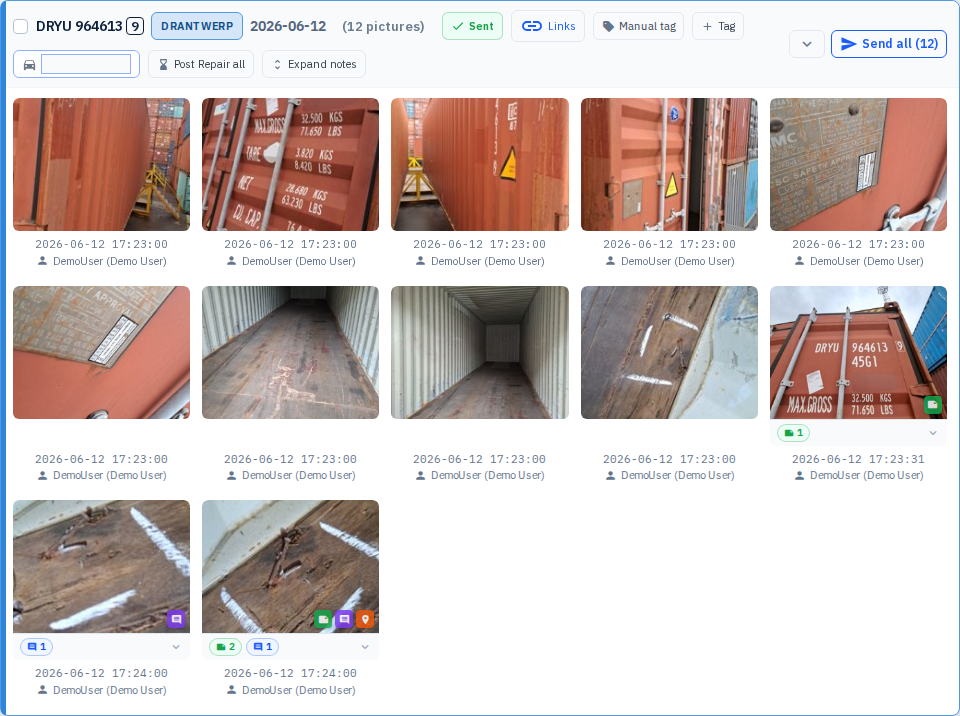
- Display: Shows as a button with icon and plate text, or "Plate" if empty
- Edit: Click the plate button to enter edit mode
- Format: Automatically converts to uppercase
- Save: Press Enter or click outside to save; Escape cancels
- Auto-save: Saves automatically on blur (clicking away)
How to Edit License Plate:
- Click the license plate button (or "Plate" if empty)
- An inline input field appears
- Type the license plate number
- Press Enter to save, or click outside the field
- Press Escape to cancel
Comment/Remark
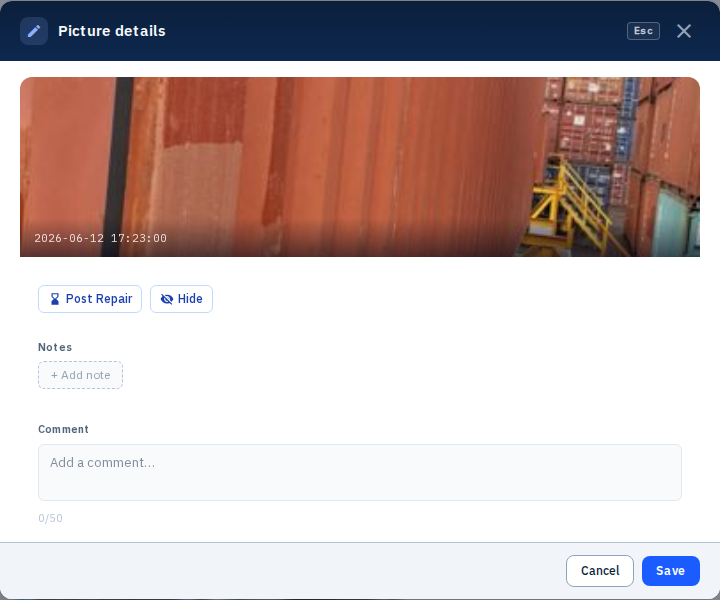
Picture-level comments (remarks) and notes are edited per picture — not on the case card header. Use either:
- The edit button on a thumbnail (picture edit modal), or
- The details panel in the full-screen lightbox
See Picture notes, comments, and geo tags for screenshots and walkthrough videos.
Post-repair (After)
Location: Header bar and selection bar
Features:
- Purpose: Mark pictures for the post-repair ("After") workflow
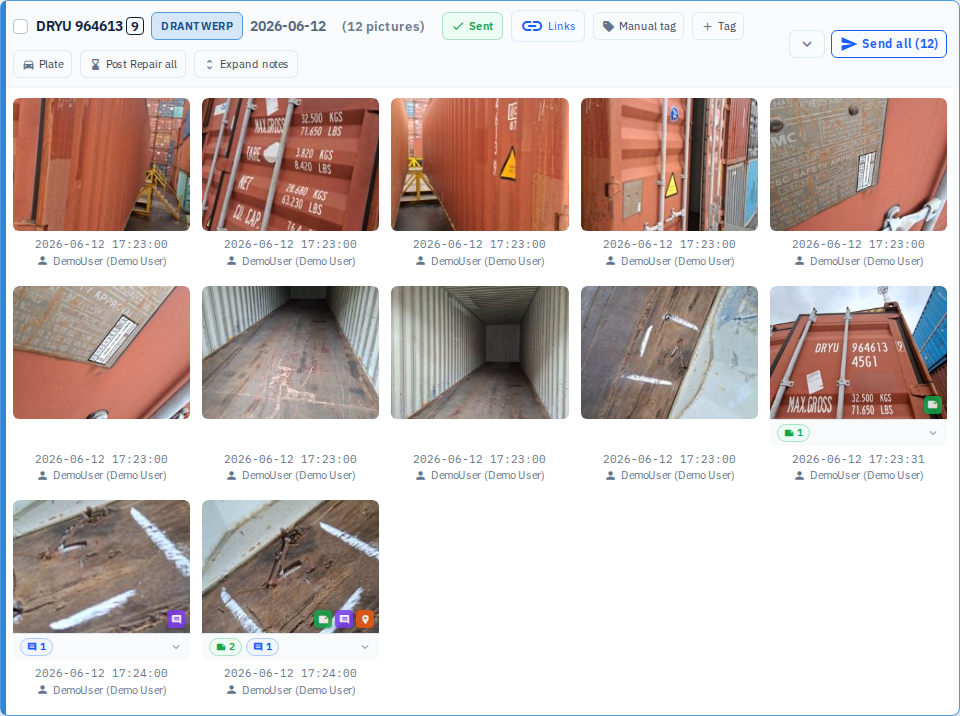
- Case header button: After all toggles post-repair status for every picture in the case
- Selection bar: After / Clear After apply to selected pictures only
- Visual indicator: Button highlights when active
- Confirmation: Marking pictures as After may show a confirmation dialog
How to Use:
- Click After all in the case header to mark every picture, or select pictures and use After in the selection bar
- Click again (or use Clear After) to remove the status
- The button highlights when active
Unhide All
Location: Header bar, appears only when there are hidden pictures
Features:
- Visibility: Only appears when the case contains hidden pictures
- Purpose: Unhide all hidden pictures in the case with one click
- Bulk Operation: Processes all hidden pictures simultaneously
- Progress Indicator: Shows sync icon while processing
How to Use:
- If you see the "Unhide" button, click it
- All hidden pictures in the case will be made visible
- The button disappears once all pictures are visible
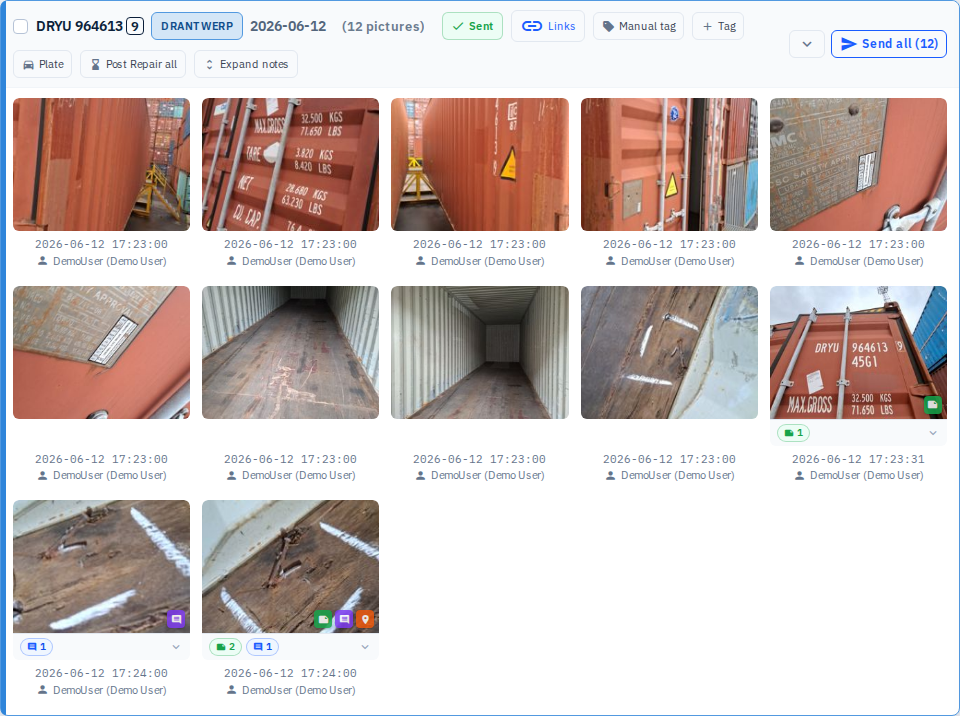
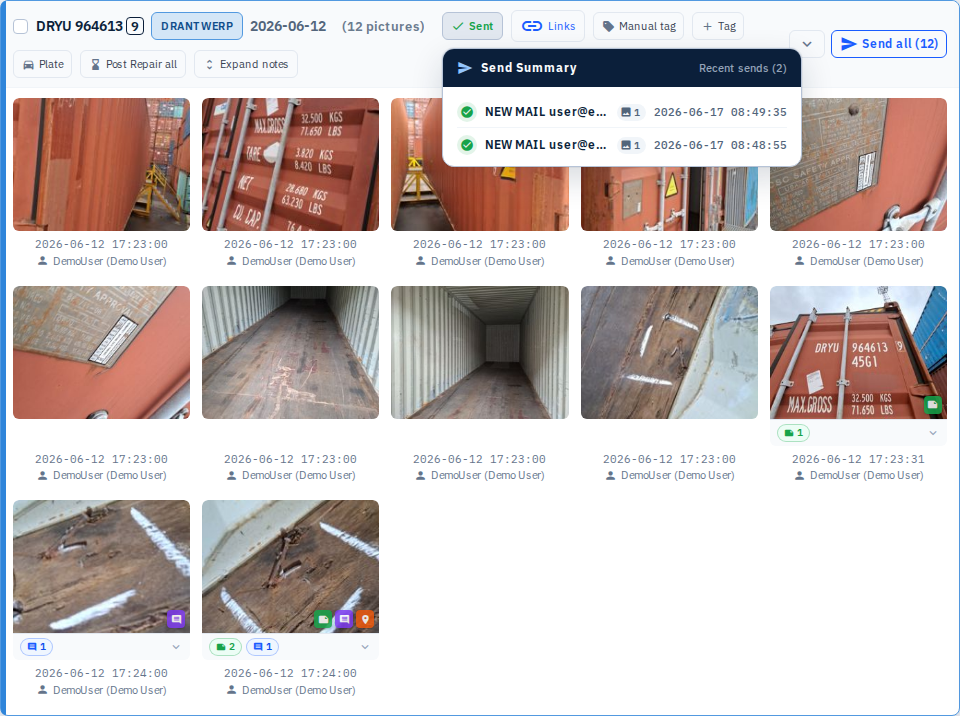
Send Log Preview
Location: Header bar, after terminal information
Features:
- Purpose: Quick preview of send status for this case
- Display: Shows a badge or indicator if pictures have been sent
- Interaction: Hover to see send details; click to open an embedded Send log modal (use Open full Send log in the modal for the full page)
- Visual: Badge appears when sends exist for this case
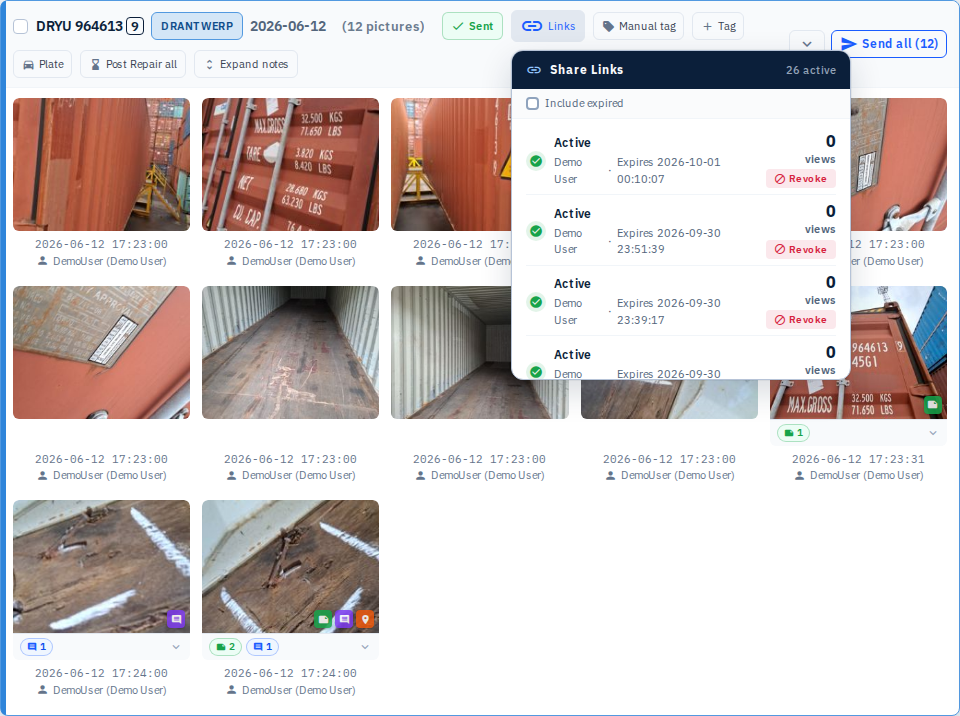
Share Links Indicator
Location: Header bar, appears only when case has share links
Features:
- Visibility: Only appears when the case has active or expired share links
- Display: Shows "Links" button with link icon
- Purpose: Quick access to view and manage share links for this case
- Interaction: Click to open the share links popup for this case
How to Use:
- If you see the "Links" button, the case has share links
- Click the button to view all share links for this case
- The share links popup lists URLs, expiry, and actions
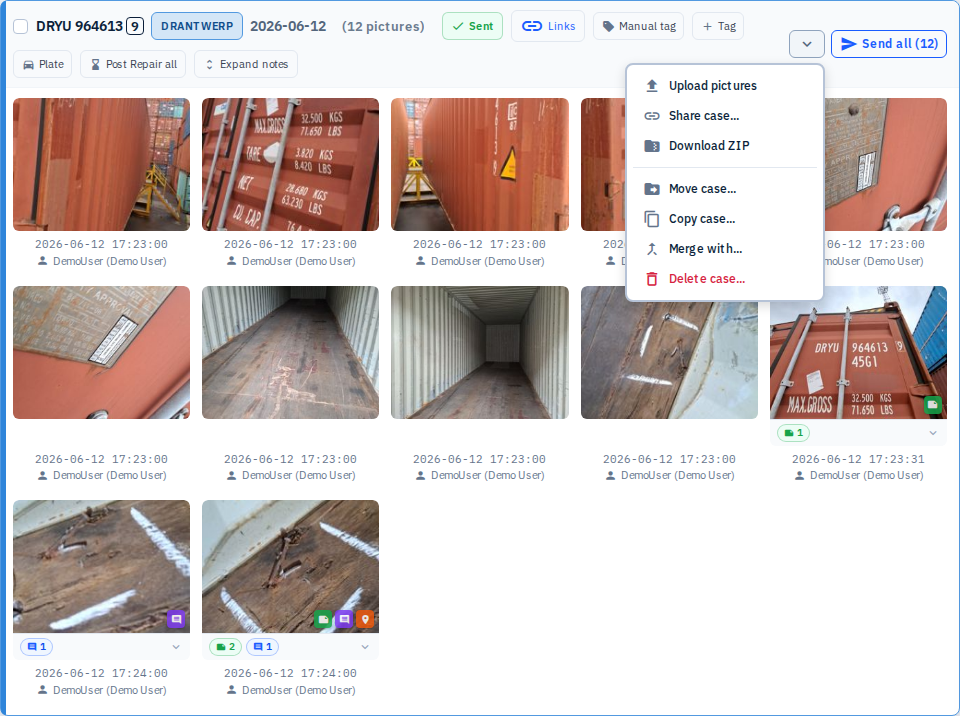
Case Menu (More Actions)
Location: Top-right of header bar
Features:
- Access: Click the More menu button (
expand_moreicon) - Purpose: Access additional case-level actions
- Actions Available:
- Upload Pictures - Add more pictures to this case
- Share Case - Create a share link for this case
- Download ZIP - Download all pictures as a ZIP file
- Move Case - Move all pictures to a different case
- Copy Case - Copy all pictures to another case
- Merge with... - Move all pictures into another existing case (see below)
- Delete Case - Move all pictures to recycle bin
How to Use:
- Click the More menu button in the top-right
- Select an action from the dropdown menu
- Follow the prompts for the selected action
Upload Pictures to Case
Access: Case menu → "Upload Pictures"
Purpose: Add additional pictures to an existing case
How to Use:
- Open the case menu (⋮)
- Click "Upload Pictures"
- The upload form opens with terminal, container, and case date pre-filled
- Select files and upload
Download Case as ZIP
Access: Case menu → "Download ZIP"
Purpose: Download all pictures in the case as a ZIP archive
How to Use:
- Open the case menu (⋮)
- Click "Download ZIP"
- A ZIP file downloads containing all pictures
- Progress indicator shows while downloading
Move Case
Access: Case menu → "Move Case"
Purpose: Move all pictures from this case to a different case (terminal/container/date)
How to Use:
- Open the case menu (⋮)
- Click "Move Case"
- Select destination terminal, container, and case date
- Confirm the move
- Warning: The current case may become empty and disappear
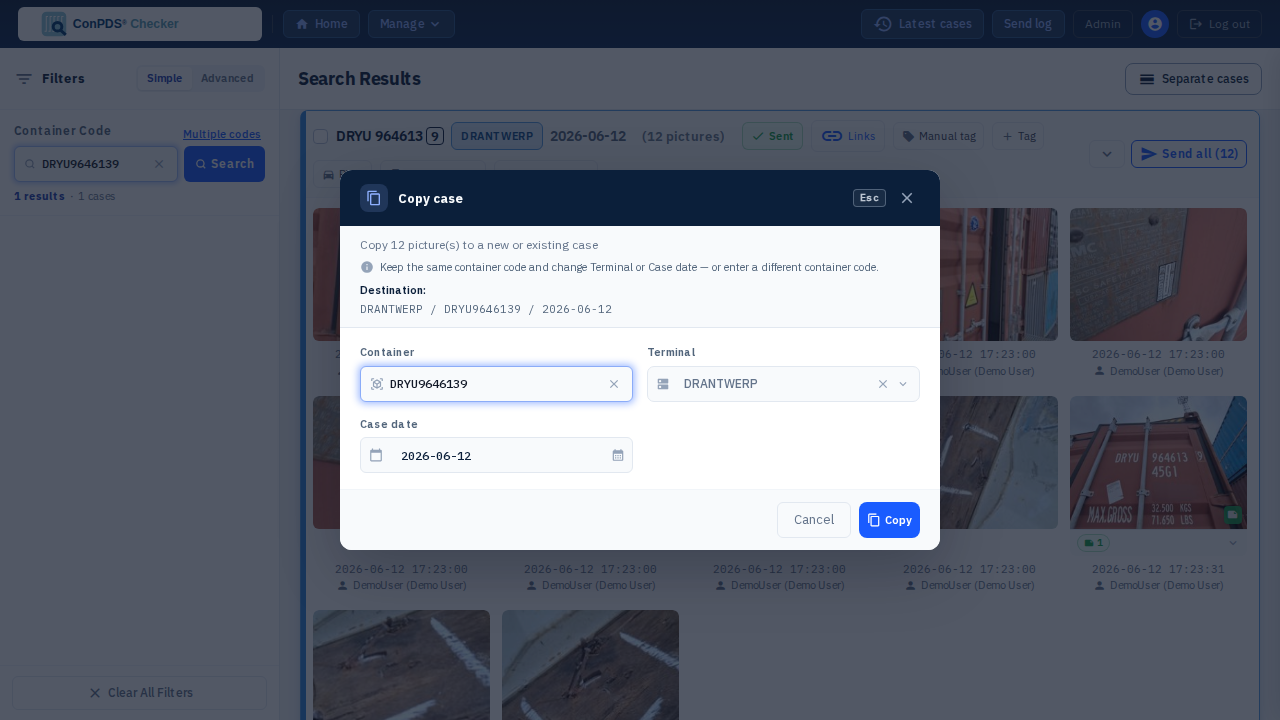
Copy Case
Access: Case menu → "Copy Case"
Purpose: Copy all pictures from this case to another case
How to Use:
- Open the case menu (⋮)
- Click "Copy Case"
- Select destination terminal, container, and case date
- Confirm the copy
- Pictures are duplicated to the destination case
Merge with... (Merge Case)
Access: Case menu → "Merge with..."
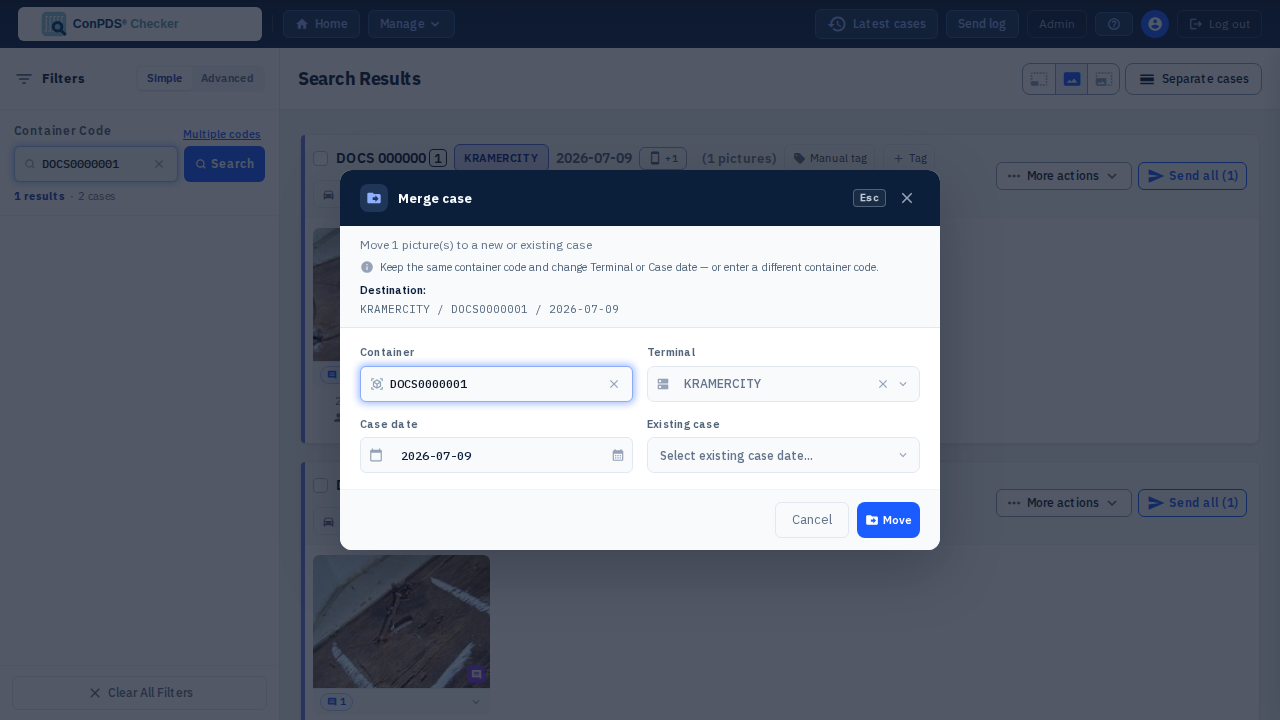
Purpose: Permanently move all of this case's pictures into another existing case — most useful for combining two mobile app cases from the same terminal/container/day into one case for good, instead of just viewing them together (see Grouped by Date, which is display-only).
How to Use:
- Open the case menu (⋮)
- Click "Merge with..."
- The destination picker opens pre-filled with this case's terminal, container, and date — sibling mobile app cases from the same day appear first in the Existing case list
- Select the destination case and confirm
- All pictures move into the destination case; this case disappears once empty
Note: This is a move, not a display toggle — once merged, the pictures belong to the destination case and cannot be split back into a separate mobile app case automatically.
Delete Case
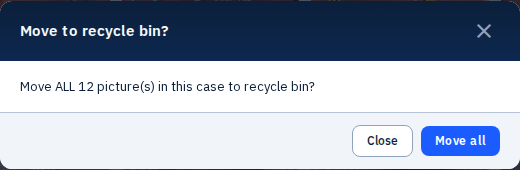
Access: Case menu → "Delete Case"
Purpose: Move all pictures in the case to the recycle bin
How to Use:
- Open the case menu (⋮)
- Click "Delete Case"
- Confirm the deletion in the dialog
- All pictures are moved to recycle bin
- The case disappears from the gallery
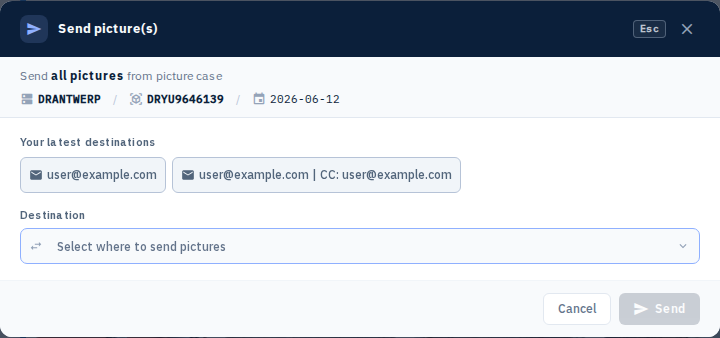
Send Button
Location: Top-right of header bar, next to the More menu
Features:
- Purpose: Send all pictures in the case to a destination
- Label: Send all (N) where N is the picture count in the case
- Hover: Prefetches send context for faster modal opening
- Access: Opens the Send to modal with every picture in the case included
To send only specific pictures, select them first and use Send in the selection bar (not the header Send all button).
How to Use:
- Click Send all (N) in the case header
- The Send to modal opens
- Select destination and configure options
- Click Send in the modal
Picture Selection and Selection Bar
Selecting Pictures
Methods:
- Select All: Click the checkbox in the case header to select all pictures
- Individual Selection: Click individual picture thumbnails to select/deselect
- Partial Selection: Mix of both methods for flexible selection
Visual Indicators:
- Selected pictures show a checkmark overlay
- Selection count appears in the selection bar
- Header checkbox shows checkmark when all are selected
Selection Bar
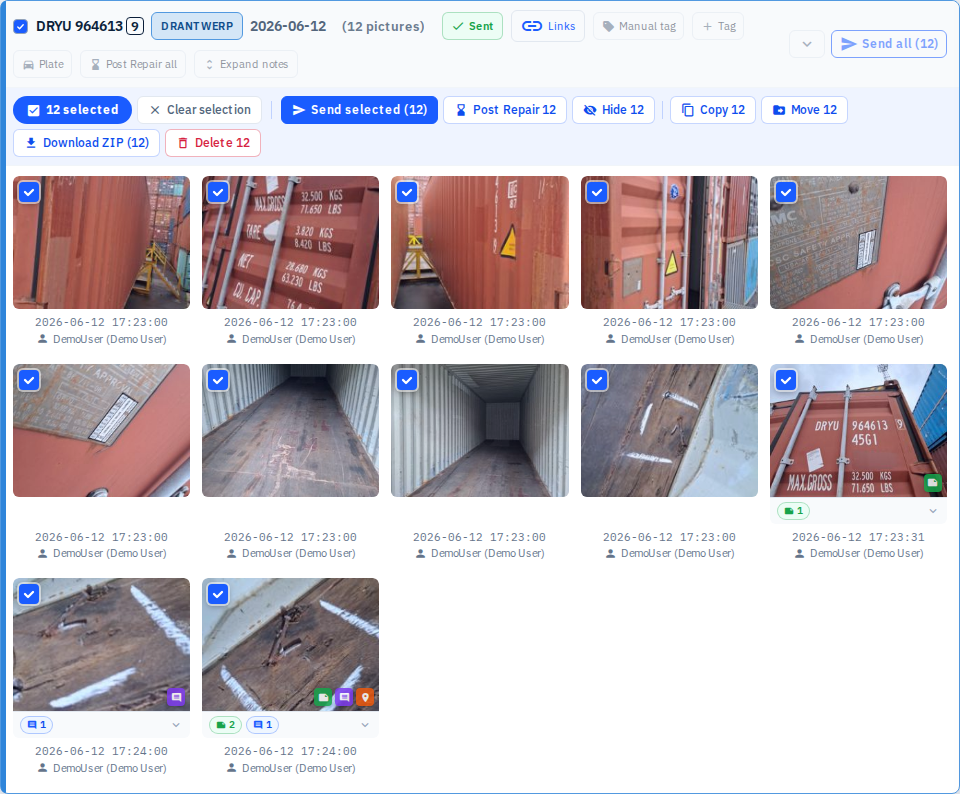
Location: Appears below the header bar when pictures are selected
Features:
- Selection Count: Shows "N selected" on the left
- Quick Actions: Multiple action buttons for selected pictures
- Clear Button: "×" button on the right to clear selection
Available Actions (when pictures are selected):
- Send — Send selected pictures to a destination
- After / Clear After — Mark or clear post-repair status on selected pictures
- Hide / Unhide — Hide or restore visibility (labels show counts when applicable)
- Copy — Copy selected pictures to another case
- Move — Move selected pictures to another case
- Download — Download selected pictures as ZIP
- Delete — Move selected pictures to recycle bin
- Clear Selection — Deselect all pictures

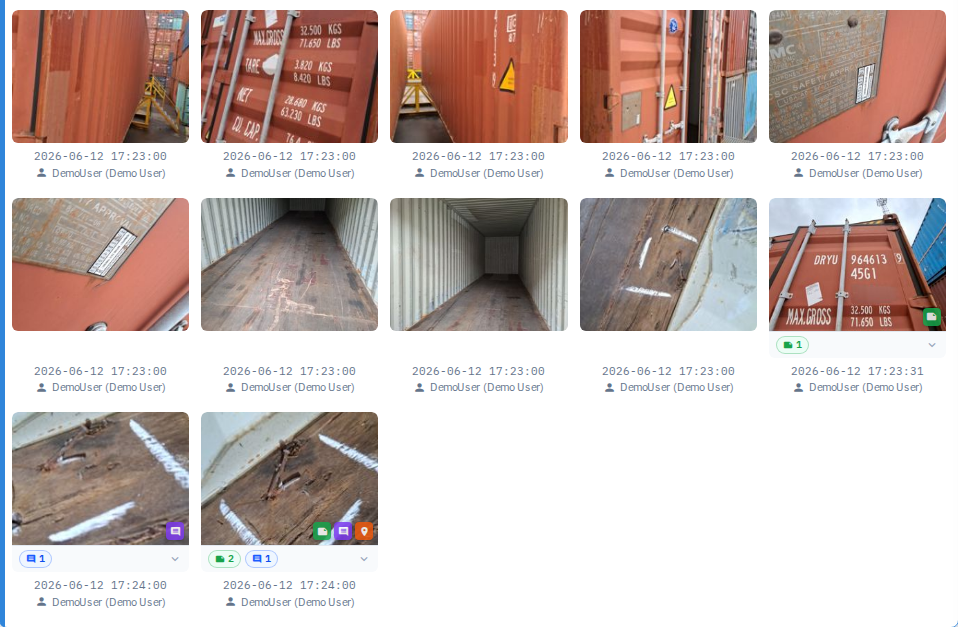
Picture Thumbnails
Location: Below the header bar
Features:
- Display: Grid of picture thumbnails
- Click Action: Opens lightbox viewer for full-size viewing
- Hover: Shows picture details on hover
- Selection: Click to select/deselect individual pictures
- Status Indicators: Visual indicators for post status, hidden status, etc.
Picture Actions (from thumbnail):
- Click: Open the lightbox viewer (view, annotate, crop, rotate)
- Edit button: Open the picture edit modal for metadata
- Select checkbox: Include the picture in bulk actions
- GPS indicator: Click when present to view location on a map
Share Links Popup
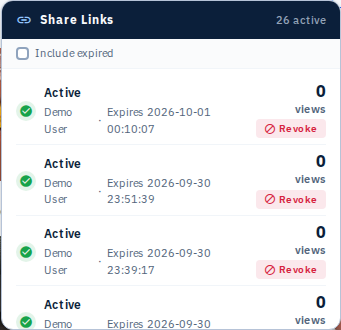
Location: Opens when the Links button in the case header is clicked
Features:
- Display: Lists share links for this case in a popup panel
- Information shown: Link URL, expiry, view count
- Actions: Copy link, revoke link
- Include expired: Toggle to show expired links
How to Use:
- Click Links in the case header (visible when the case has share links)
- Manage links in the popup
- Click outside or press Escape to close
Picture Edit and Lightbox
Lightbox viewer: Click a thumbnail to view full size, navigate between pictures, and use the editor (annotations, crop, rotate) when permitted. Full documentation: Full-screen lightbox.
Picture edit modal: Click the edit button on a thumbnail to change picture-level metadata (notes, remark, post/hide) without opening the full lightbox editor. See Picture metadata.
Best Practices
Organizing Cases
- Use tags to categorize cases by inspection type, damage category, or priority
- Add license plates for vehicle-related inspections
- Use comments for quick notes about the case
Bulk Operations
- Select all pictures in a case using the header checkbox for case-wide actions
- Use individual selection for precise control over which pictures to act on
- Combine selection methods for complex workflows
Quick Actions
- Use inline editing (tags, plate, comment) for quick metadata updates
- Use After all for marking entire cases for the post-repair workflow
- Use Unhide all to quickly restore visibility of hidden pictures
Sending Pictures
- Use Send all (N) in the case header to send every picture in the case
- Select specific pictures and use Send in the selection bar to send only those pictures
Tip: Most metadata changes save automatically. Look for visual feedback (button highlights, checkmarks) to confirm actions.
Warning: Some actions like "Move Case" and "Delete Case" affect all pictures in the case. Use with caution.
Note: Available actions depend on your user permissions. Contact your administrator if you need access to additional features.