Send Feature - Complete Workflow Guide
The Send feature allows you to deliver inspection pictures to various destinations including EDI systems, email recipients, and share links. This guide covers the complete workflow from opening the Send modal to tracking sent items.
Opening the Send Modal
From Case Card
Method 1: Send All Pictures
- Navigate to a case card in the Gallery
- Click Send all (N) in the case card header
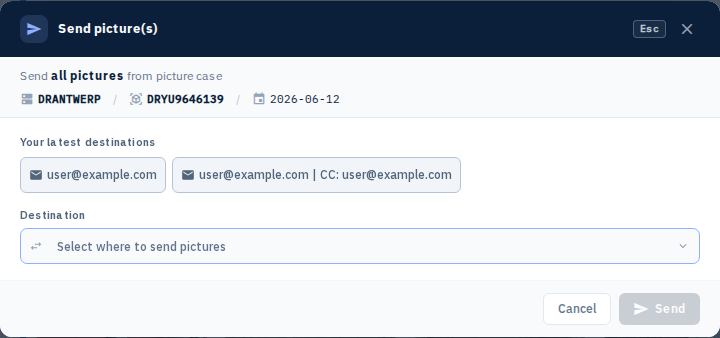
- The Send to modal opens with all pictures in the case
Method 2: Send Selected Pictures
- Select specific pictures using the checkboxes (or Select all in the header)
- Click Send in the selection bar (not the header Send all button)
- The Send to modal opens with only selected pictures included
From Selection Bar
When pictures are selected, a selection bar appears with a "Send" button:
- Select pictures in a case
- Click "Send" in the selection bar
- The Send To modal opens

Send To Modal Overview
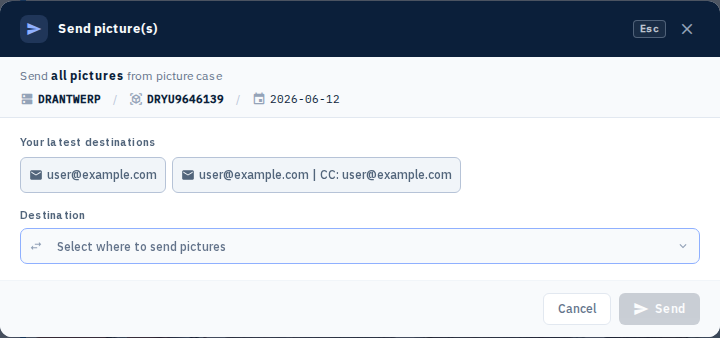
The Send To modal provides a unified interface for all sending operations. It adapts based on the destination type you select.
Modal Layout
Top Section:
- Case information (terminal, container, case date)
- Picture count indicator ("All pictures" or "N selected")
- Pictures to send segmented control: All (default) · Before · Post Repair
- Close button
The scope control narrows which pictures are enqueued (server-enforced via POST_REPAIR). With an explicit thumbnail selection, All keeps the selection; Before / Post Repair intersect the selection with that flag. The live count updates as you change scope; Send is disabled when the scope yields zero pictures.
This is independent of the EDI Param SEND_PICTURES_FILENAME_MASK_POSTREPAIR, which only changes the filename for Post Repair pictures that are included in a send — it does not choose which pictures to send.
Destination Selection:
- Frequent destinations (chips)
- Latest destinations (chips)
- Destination picker dropdown
Configuration Section:
- Destination-specific fields (appears based on selection)
- Email composition (for New Mail)
- Advanced options
Action Buttons:
- Send button (enabled when ready)
- Cancel button
Destination Types
1. EDI Destinations
EDI (Electronic Data Interchange) destinations send pictures to external systems via FTP, FTPS, SFTP, or AEMS protocols.
Selecting an EDI Destination
Method 1: Frequent Destinations
- Frequently used destinations appear as chips at the top
- Click a chip to select that destination
- If no additional fields are required, the send may auto-trigger
Method 2: Latest Destinations
- Recently used destinations appear as chips
- Click a chip to select that destination
- Shows the last-used configuration
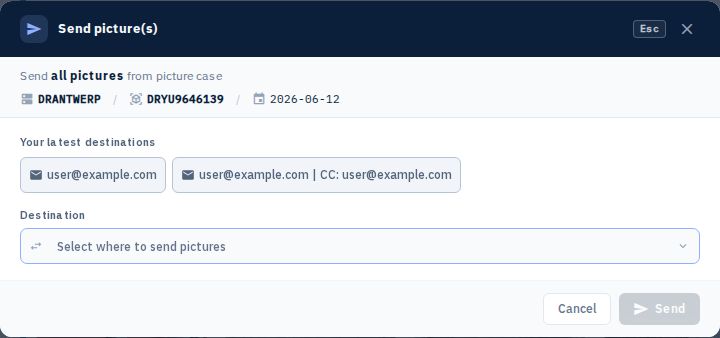
Method 3: Destination Dropdown
- Click the destination picker
- Choose from configured EDI destinations or New mail
EDI Destination Configuration
Administrator reference: Tenant Admin → EDI and EDI Params.
Required Fields (if destination requires them):
-
Estimate ID
- Some destinations require an estimate number
- Enter the estimate ID in the provided field
- Field appears only for destinations that require it
-
Estimate Date
- Some destinations require an estimate date
- Enter the date in YYYY-MM-DD format
- Field appears only for destinations that require it
-
Message Body
- Some destinations allow a custom message body
- Enter text in the message body field
- Field appears only for destinations that support it
Not illustrated in this guide — capturing this state requires an EDI destination configured with Estimate ID / Estimate Date / Message Body fields, which isn't available in the documentation environment.
AEMS Destinations
AEMS (Automated Email Management System) destinations are a special type of EDI destination.
Features:
- May require selecting from multiple maintenance orders
- If multiple orders exist, a selection dialog appears
- Choose the correct order ID before sending
Workflow:
- Select an AEMS destination
- If multiple orders exist, a dialog appears
- Select the correct maintenance order number
- Click "Send"
Not illustrated in this guide — capturing this state requires an AEMS destination with multiple maintenance orders, which isn't available in the documentation environment.
Auto-Send for EDI
When Auto-Send Triggers:
- Destination has no required input fields
- Destination is not "New Mail"
- Destination is not AEMS (or AEMS order is pre-selected)
- Clicking a destination chip automatically sends
Behavior:
- Modal shows "Sending..." status immediately
- Send is queued without further user input
- Modal closes after successful queue
Not illustrated in this guide — this is a transient, sub-second status that appears only during a live send to a no-input destination, which isn't configured in the documentation environment.
2. New Mail (Email)
"New Mail" is a special destination type for sending pictures via email.
Selecting New Mail
- Click "New Mail" from frequent destinations, latest destinations, or destination dropdown
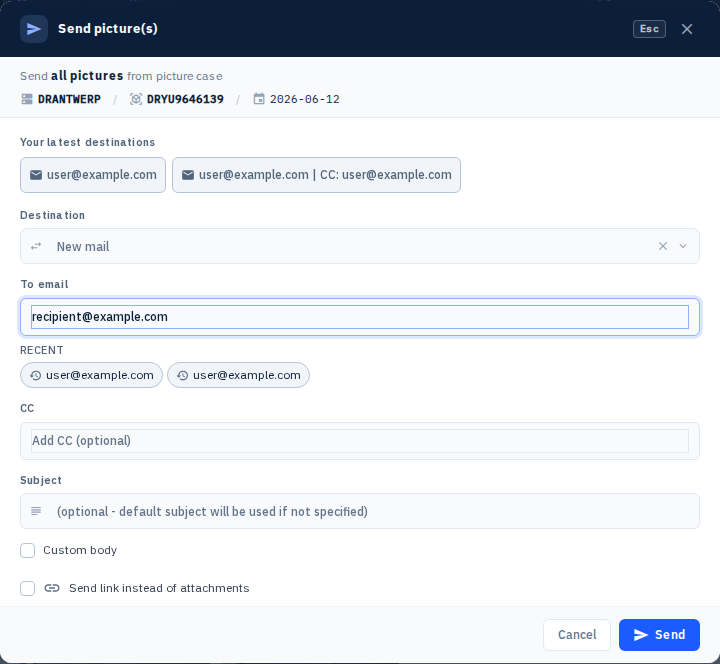
- The modal expands to show email composition fields
- Email fields appear below destination selection
Email Composition
To Field (Required)
- Purpose: Primary email recipients
- Input: Type email addresses and press Enter, or open the address book
- Multiple Recipients: Add multiple addresses separated by semicolons
- Auto-complete: Consolidated suggestions from recent recipients, Global Address Book, and My Contacts (one row per address; badges Global / Personal / Both)
- Address book: Contacts button beside the field opens a searchable multi-select picker (filter All / Global / Personal)
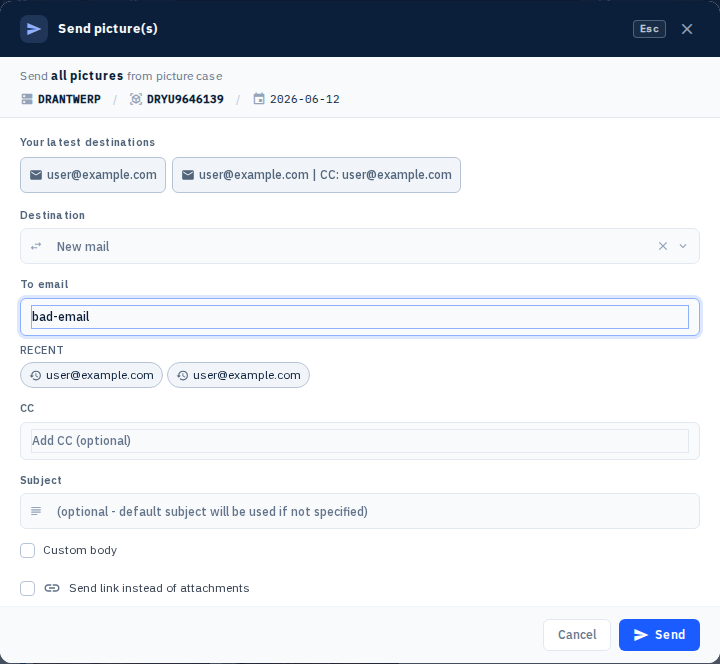
- Validation: Invalid addresses are highlighted
How to Add Recipients:
- Click in the "To" field
- Type an email address or click Open address book, select contacts, then Add selected
- Press Enter to add a typed address as a chip
- Repeat for additional recipients
- Invalid addresses show an error
CC Field (Optional)
- Purpose: Carbon copy recipients
- Input: Same as To field (including the address book button)
- Behavior: Recipients receive a copy but are not primary recipients
Subject Field
- Purpose: Email subject line
- Input: Free text
- Auto-focus: Focuses automatically after adding To addresses (if using presets)
Body Field (Optional)
- Purpose: Email message body
- Input: Multi-line text area
- Toggle: Enable/disable body inclusion
- Default: Disabled (email sent without body text)
Email Attachment Options
Option 1: Send as Attachments
- Default: Pictures are attached to the email
- Behavior: Recipients download pictures from email attachments
- Limitations: Subject to email server size limits
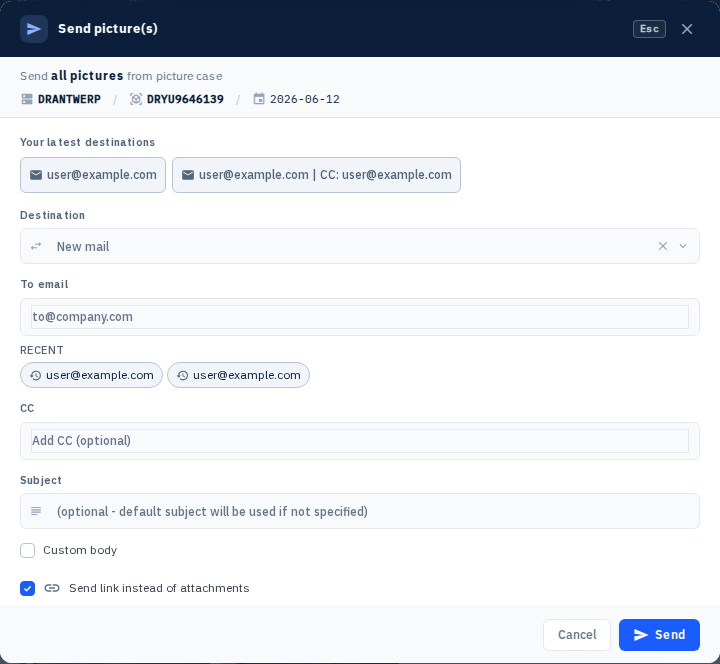
Option 2: Send as Share Link
- Toggle: Enable "Send link instead of attachments"
- Behavior: Creates a share link and sends it in the email
- Benefits: No size limits, better for large numbers of pictures
- Configuration:
- Expiry Days: Set link expiration (default: 90 days)
- Notify on Access: Get notified when link is accessed
Personal Contacts Integration
Address book picker:
- Contacts button on To / CC opens a nested picker (search, source filter, multi-select)
- Same address in Global and Personal books appears once with a Both badge
- See Email sending — Address book picker
Recent Recipients:
- Recently used email addresses appear as chips in "Latest destinations"
- Click a chip to restore To/CC (and related New mail settings) without auto-sending
- Latest chips follow you across terminals you are allowed to use
Favorite Contacts:
- Personal favorites appear in typeahead suggestions
- Manage contacts from My Contacts in the account menu
Save to Contacts Prompt:
- After sending to new addresses, a prompt appears
- Choose to save email addresses to "My Contacts"
- Saved addresses appear in future send operations
Not illustrated in this guide — these states only appear after completing real email sends (to populate recent recipients and trigger the save-to-contacts prompt), which the documentation environment doesn't perform.
Email Presets
Frequent Destinations:
- Your most-used email configurations appear as chips
- Click a chip to apply the preset (To, CC, Subject, Body, link settings)
- Focuses the Send button so you can confirm; it does not auto-send
Latest Destinations:
- Recently used New mail configurations appear as chips
- Click to restore To/CC and preferences, then confirm Send
- Preserves link preferences from last send
Not illustrated in this guide — capturing this requires configured frequent email presets (To/CC/Subject/Body/link settings), which isn't set up in the documentation environment.
3. Share Links (from Send)
Share links can be created directly from the Send modal when using "New Mail".
Workflow:
- Select "New Mail" destination
- Enable "Send link instead of attachments"
- Configure expiry and notification settings
- Send email
- Share link is created automatically and included in the email
Note: Share links can also be created independently from the case card menu (see Case Card documentation).
Sending Process
Step-by-Step: EDI Destination
-
Open Send Modal
- Click "Send" on case card or selection bar
-
Select EDI Destination
- Click a frequent/latest destination chip, or
- Select from destination dropdown
-
Fill Required Fields (if any)
- Estimate ID (if required)
- Estimate Date (if required)
- Message Body (if required)
-
Review Configuration
- Verify destination is correct
- Check that all required fields are filled
-
Send
- Click "Send" button
- Modal shows "Sending..." status
- Status updates to "Queued" or "Scheduled"
- Modal closes after confirmation
Not illustrated in this guide — same EDI destination limitation as above; see EDI Destination Configuration.
Step-by-Step: Email (New Mail)
-
Open Send Modal
- Click "Send" on case card or selection bar
-
Select New Mail
- Click "New Mail" from destinations
-
Add Recipients
- Type email addresses in "To" field, press Enter
- Optionally add "CC" recipients
-
Compose Email
- Enter subject line
- Optionally enable and fill body text
-
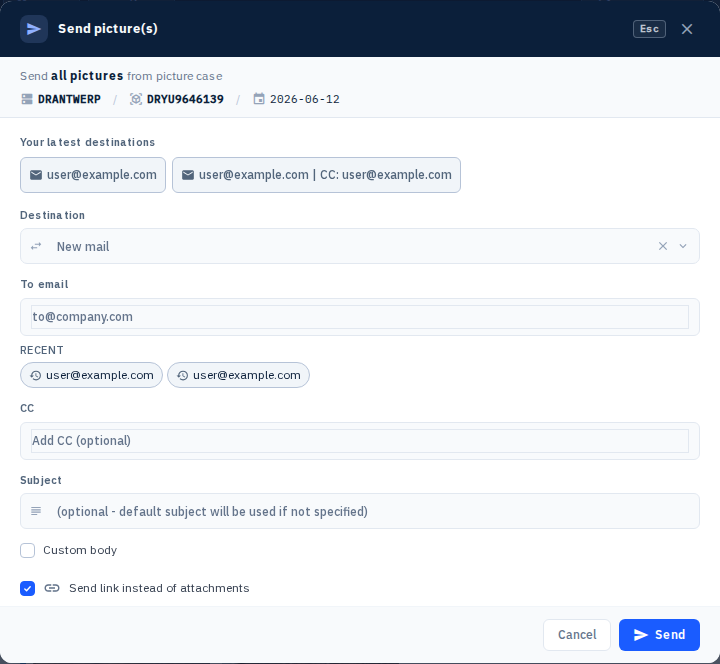
Choose Attachment Method
- Attachments: Leave toggle off (default)
- Share Link: Enable "Send link instead of attachments"
- Set expiry days if using link
- Enable notifications if desired
-
Send
- Click "Send" button
- If using share link: "Creating link..." then "Sending email..."
- Status updates to "Queued"
- Optionally save recipients to contacts
- Modal closes after confirmation
Send Status and Feedback
Status Messages
"Sending..."
- Initial status when send is triggered
- Appears immediately after clicking Send
"Creating link..."
- Appears when creating a share link for email
- Only for New Mail with link option enabled
"Sending email..."
- Appears after link creation, before email send
- Only for New Mail sends
"Queued"
- Send has been queued for processing
- Appears after successful queue
"Scheduled — N min delay"
- Send is scheduled with a delay
- Shows delay time in minutes
Not illustrated in this guide — these are transient runtime states during a live send; "Scheduled" additionally requires a destination configured with a send delay, which isn't set up in the documentation environment.
Error Handling
Invalid Email Addresses
- Invalid addresses are highlighted in red
- Error message: "Invalid email address: [address]"
- Must fix before sending
Missing Required Fields
- Error message indicates which field is missing
- Send button remains disabled
- Fill required field to enable send
Send Failure
- Error message appears in red
- Status resets to allow retry
- Check error message for details
The invalid-email-address state is shown above in Screenshot 9. The missing-required-field and send-failure states aren't illustrated here — the former needs an EDI destination with required fields left empty, the latter needs a reproducible send failure — neither is available in the documentation environment.
Advanced Features
Dry Run Preview
Some destinations support dry-run preview:
- Shows what would be sent without actually sending
- Preview appears in a dialog
- Review before confirming actual send
Not illustrated in this guide — dry-run preview requires a send destination with that feature enabled, which isn't configured in the documentation environment.
Multiple Orders (AEMS)
When AEMS destination has multiple maintenance orders:
- Selection dialog appears
- Choose the correct order
- Send proceeds with selected order
Retry Failed Sends
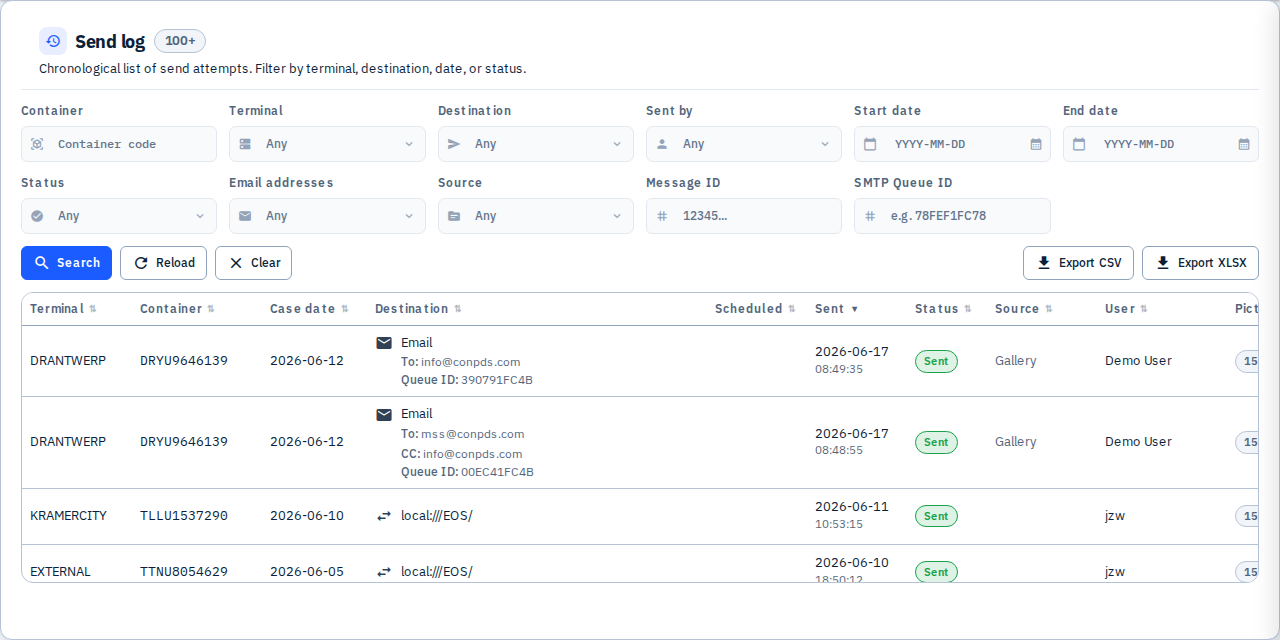
Failed sends appear in the Send Log:
- Click Send log in the header (or open the embedded modal from a case Sent chip)
- Find failed send entries
- Use Select for retry / Retry selected (or retry a single row)
- The send is queued again with the same configuration
Best Practices
For EDI Destinations
- Use frequent destinations for quick access to common sends
- Fill all required fields before sending
- Check Send Log for delivery confirmation
For Email
- Use share links for large numbers of pictures
- Use attachments for small, quick sends
- Save frequently used recipients to contacts
- Set appropriate expiry for share links
General
- Verify destination before sending
- Check picture selection (all vs. selected)
- Review Send Log regularly to track deliveries
- Retry failed sends after resolving issues
Tip: Hover over the "Send" button on a case card to prefetch send context, making the modal open faster.
Warning: Email sends are subject to server size limits. Use share links for large numbers of pictures or large file sizes.
Note: Send operations are queued and processed in the background. Check the Send Log for delivery status and any errors.